

You’re staring at your computer screen filling out your first cloth diaper order. You’ve chosen the type you want to try, the brand, the print, and only one decision remains…
…snap closures or hook & loop (Velcro)?
With so many different opinions out there and all the pros and cons to consider, it can be hard to know which to commit to. Like me, you may find that your child’s needs end up changing over time. The good news is, you don’t have to be stuck with your decision for the remainder of your child’s diapering days. Diaper alterations are not as scary as they seem. In fact, converting hook and loop diapers to snaps doesn’t even require a sewing machine.
When we began our cloth diapering journey, I built my stash with a majority of hook and loop pockets and covers. This seemed to be the easiest way for us to transition away from disposables as well as the most fail-proof way for grandparents to get the hang of our new system.
After two years of weekly use, many of the “loop” pieces began to lose their stickiness. Brooks had also become fascinated with peeling the tabs off and removing his diapers.
Yes, this led to a few poop incidents.
No, I’m not ready to talk about it.
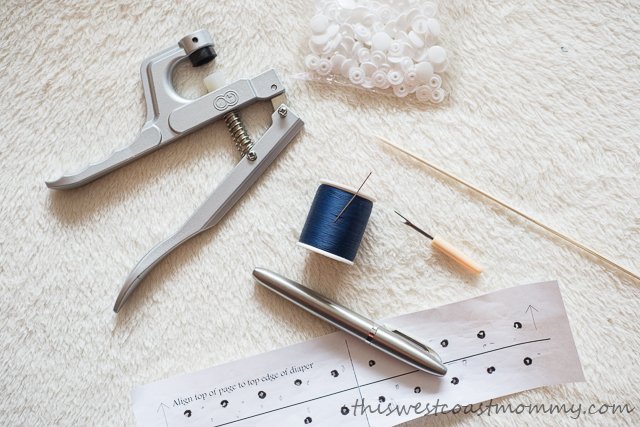
So let’s get started, shall we? Here’s what you’ll need:
- This PDF snap template
- A fabric marking pen (or Sharpie if you like to live on the edge like me)
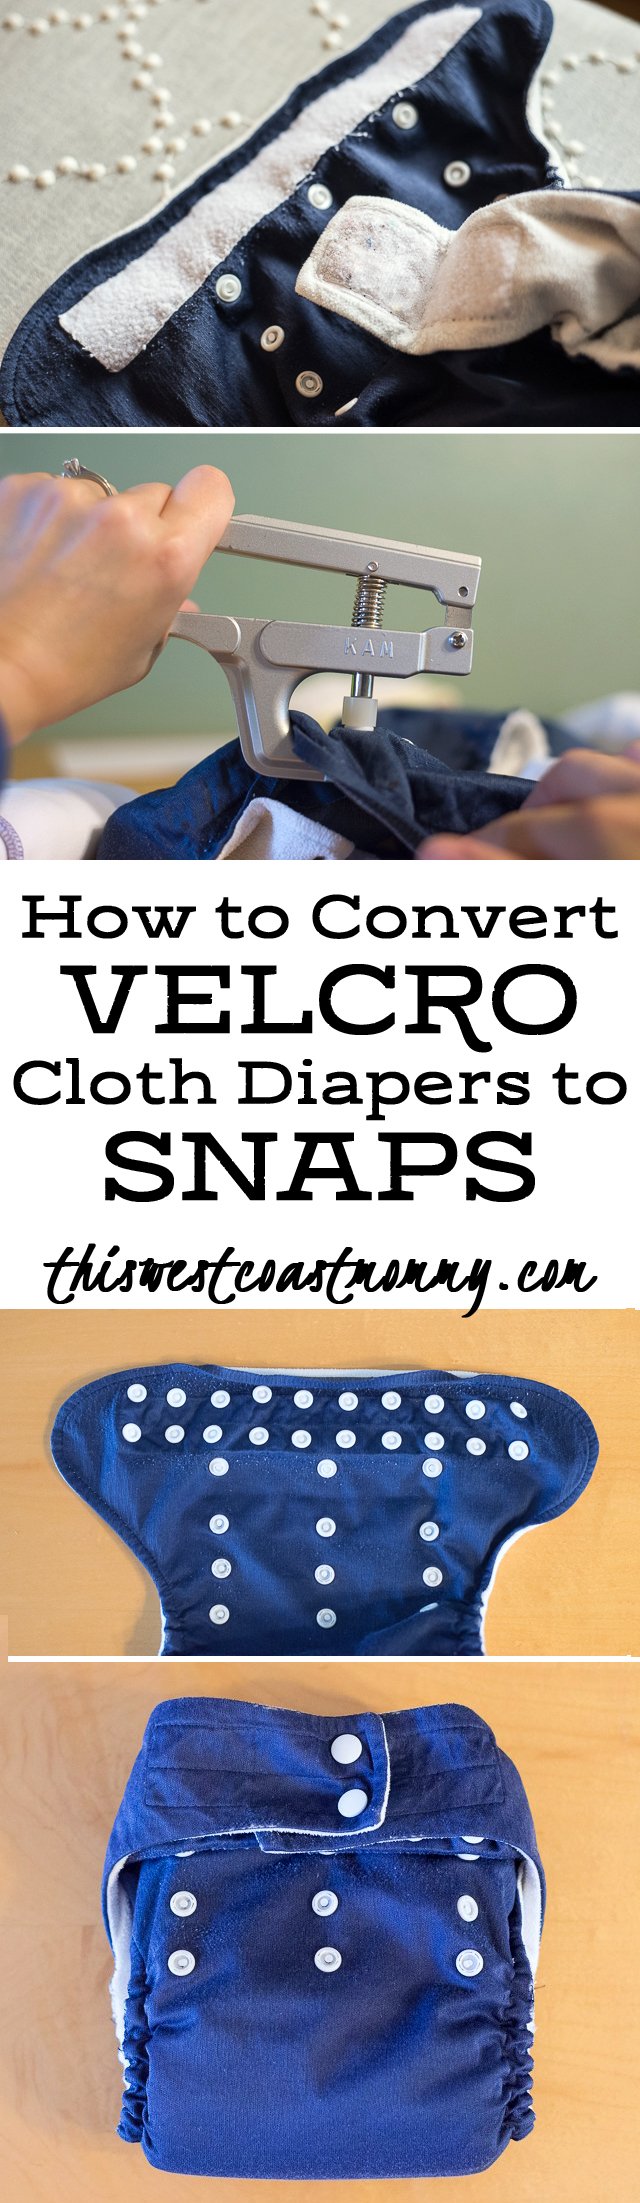
- Kam snaps and a pair of snap pliers
- An awl (or the ever useful wooden barbecue skewer)
- A seam ripper
- A needle and thread
An important note before beginning—use a scrap piece of fabric to test your snaps. I bought a kit with many different colors, and I discovered too late that one of the colors was defective, and the snaps would not close completely. Yes…this led to another poop story.
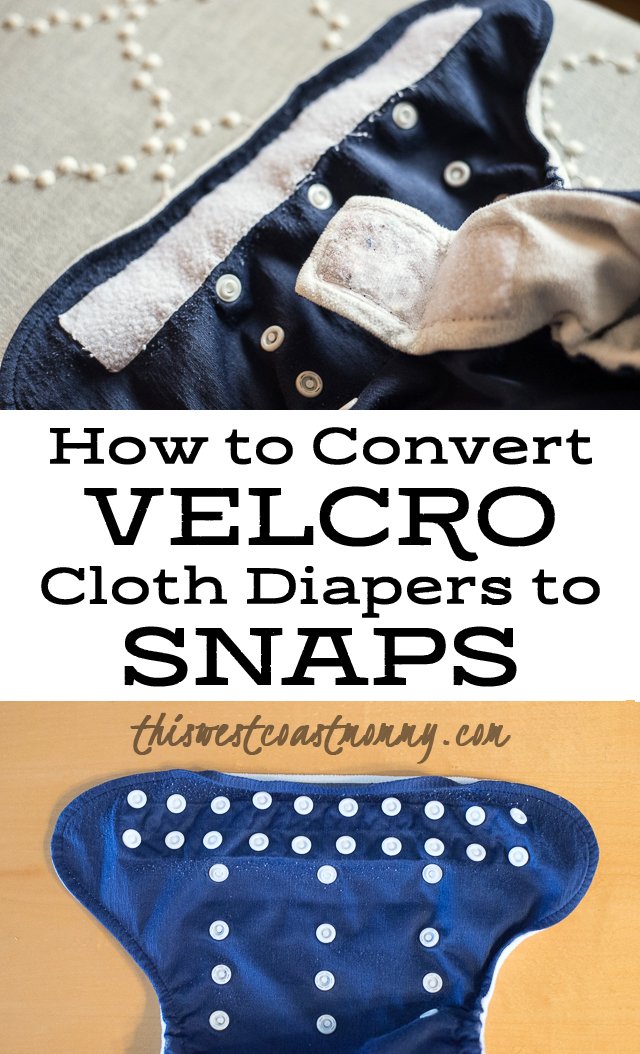
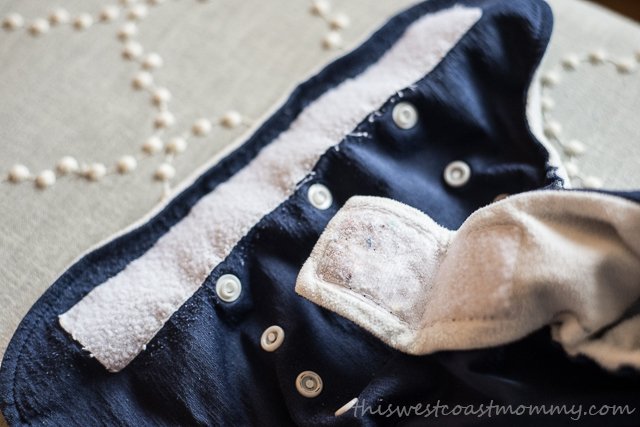
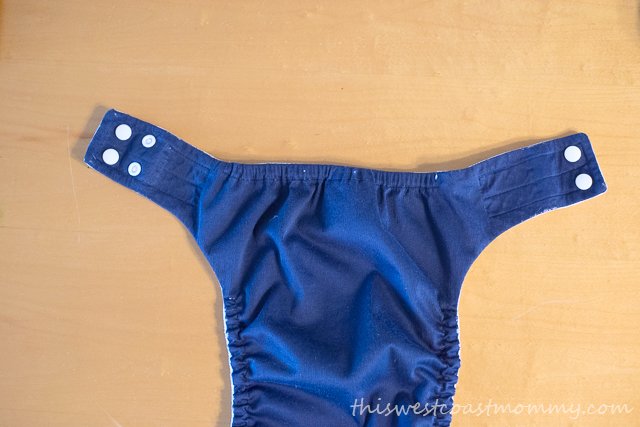
Step 1: Remove all the hook and loop pieces
This is easy but tedious work. Simply find a stitch with your seam ripper, and start picking away until you can carefully remove the entire piece of hook and loop. I recommend picking at the stitches from the top rather than underneath so you don’t accidentally damage the PUL.
Put on one of your favorite shows and just plug away at it.
There—a nice naked diaper.

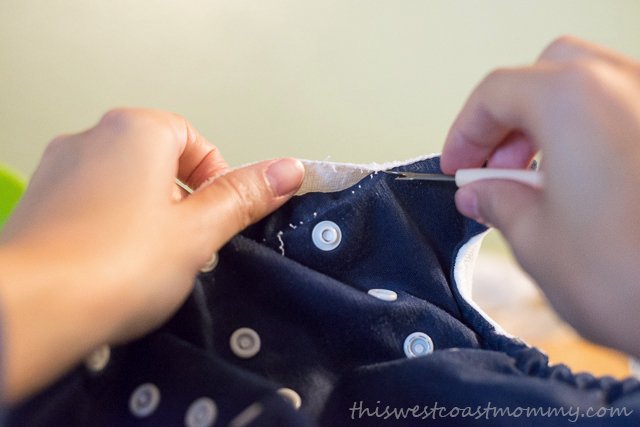
Step 2: Remove the top stitching on a pocket diaper or AIO
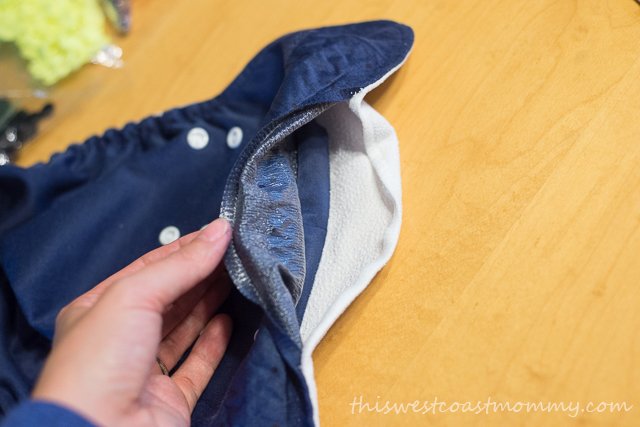
This step will not be necessary if you’re working with a cover that is one simple layer of PUL. If you have multiple layers, however, like a pocket diaper or all-in-one, you’ll need to open up some space to get your snap pliers in behind the PUL.
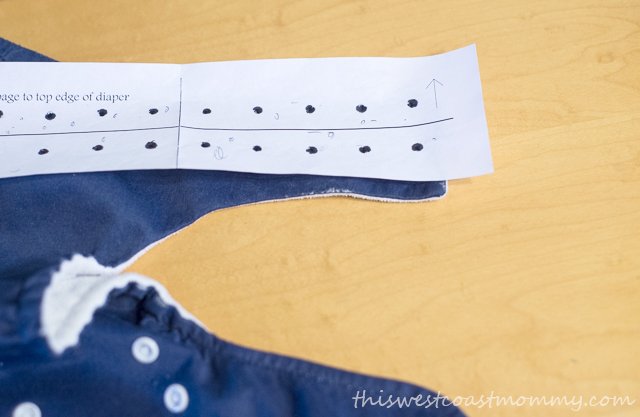
Step 3: Mark where you want your snaps to be
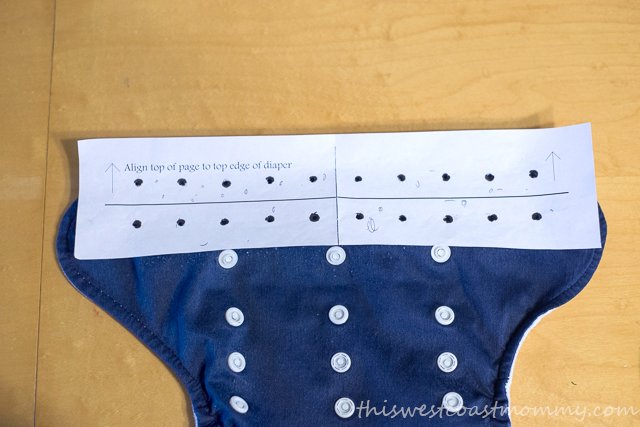
Center your template on the front of the diaper. You’ll notice little marks left by the old stitching—these make good guidelines. I also found it helpful to pierce my makeshift awl through the dots on the template first to make little holes for my marker to go through.
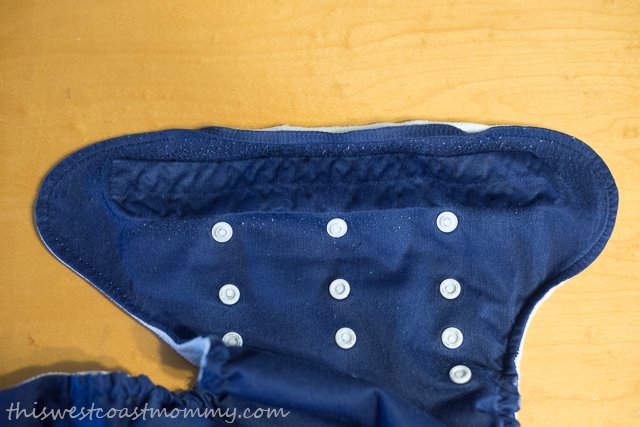
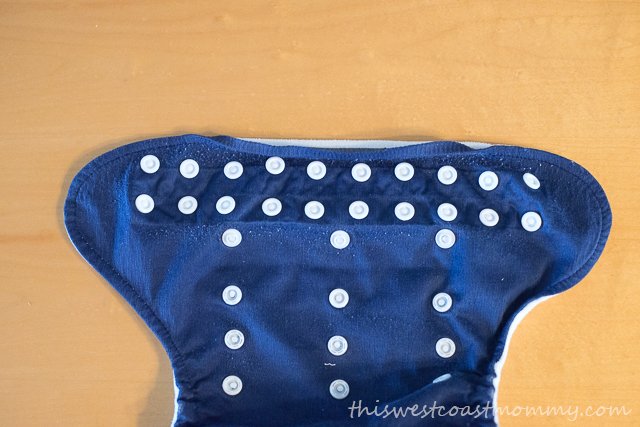
Once everything is lined up the way you want it, mark the 20 spots where the socket snaps will go on the front of the diaper.
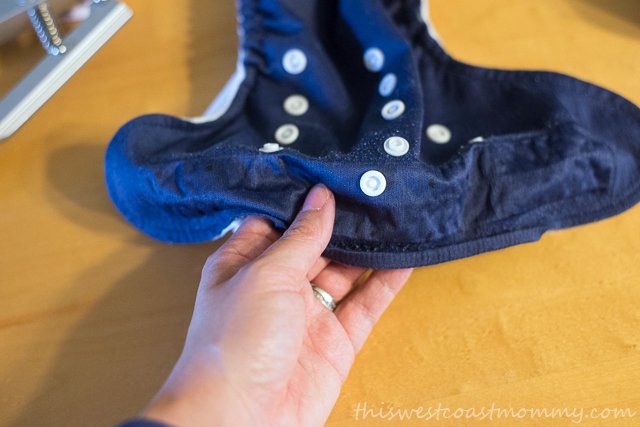
Using the same method of following the old stitch marks, line up your template with your side tabs. Make two vertical marks on one side tab and four on the other. This will give you the option of a crossover snap for smaller babies.
Step 4: Sort out your snap pieces
This step is not entirely necessary, but I highly recommend doing it so you don’t accidentally install the wrong kind of snap pieces.
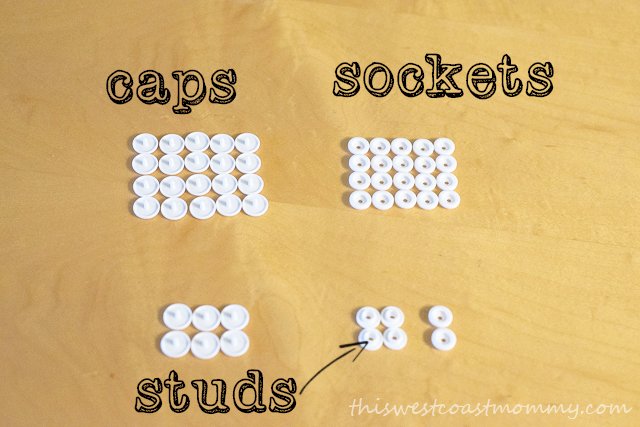
For this template you’ll need 20 caps and sockets for the front, and 6 caps, 2 sockets, and 4 studs for the side tabs.
I like to lay mine out all pretty to keep track of my progress as I install them.
Step 5: Make a hole for each snap
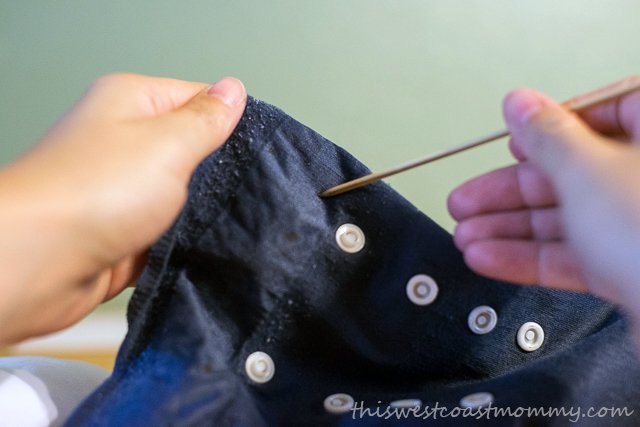
Using the marks you made with the template, push your awl—or whatever sharp pokey item you have—through each dot to make a small hole for your snaps.
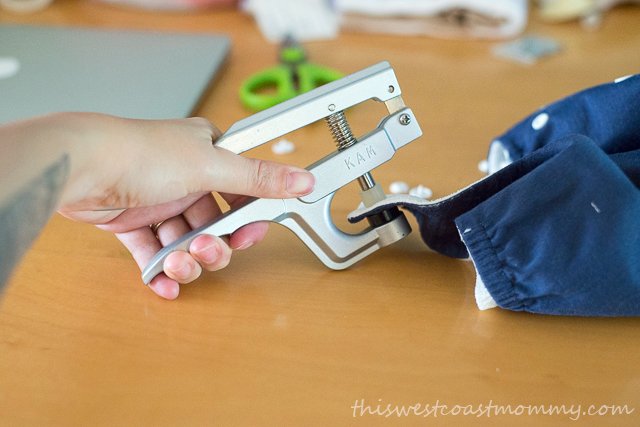
Step 6: Assemble your snaps

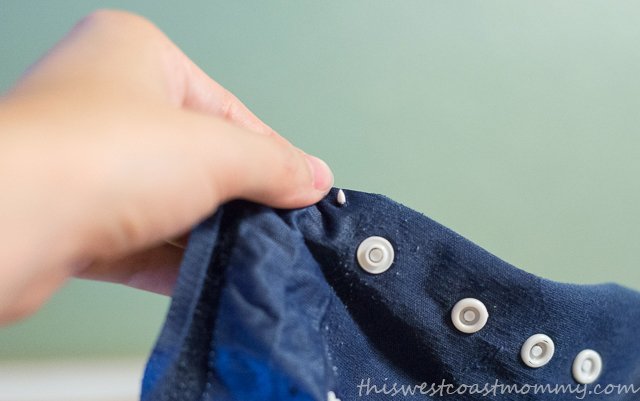
You’ll notice that the caps have a sharp, pointy piece of plastic sticking up from them. Push this piece through the PUL so it sticks up out of the front of the diaper.
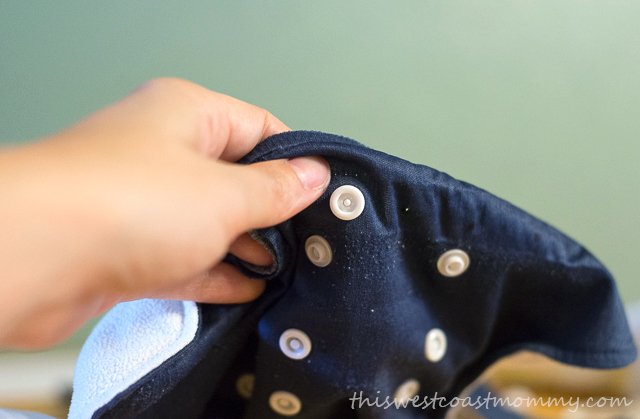
Gently set a socket face up on the pointy part of the cap sticking through the PUL, and with both pieces resting in place, align your snap pliers and press the cap and socket firmly together.
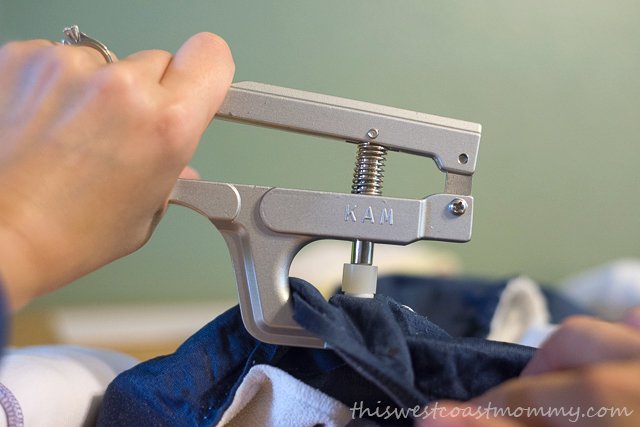
Remove the snap pliers, and check out your fancy new snap.
Now go back to watching your favorite show and do that 19 more times on the front of the diaper.
When you’re done with the front, it’s time to move to the sides.
Each side will have two vertical stud snaps facing in toward the diaper. So if the diaper is fastened on your baby, you will see the caps at the edge of each side tab, and the studs will be face down. On the side with two additional markings, you will also install two socket snaps facing out. These will allow you to cross one side tab over the other to give a tighter fit.
Step 7: Sew the top closed
If you’re working with a pocket diaper or AIO, it’s time to sew the top closed again. Make a simple top stitch with good quality thread.

See? That wasn’t so hard! And you, my friend, are a rock star.

Let’s all breathe a deep sigh of relief for fewer poop stories in the future.
Pin this tutorial for later!
 Samantha Levang is a contributor at This West Coast Mommy, specializing in cloth diaper and baby item reviews. She lives in Washington state with her husband, toddler son, Brooks, and new baby girl, Riley. Between diaper changes and loads of laundry, she enjoys landscape photography and the never-ending process of home decorating.


I’ve been scared of H&L for this reason. Thanks for the simple tutorial!
What an awesome article! The idea of putting on snaps was always kind of intimidating for me, but your tutorial totally makes it seem doable. Totally true about the kids’fascination with stripping once they figure out Velcro… This is good when you’re trying to potty train, not so good when you’re not. What I started doing was putting a snap cover overtop of the Velcro closured diaper, or putting stretchy shorts overtop. That seems to work and is more comfortable for kiddo.
KAM snaps are awesome for this. I bought some used diapers with worn out H&L for really cheap and just replaced them all with snaps. It is amazing how easy it was and now I dont understand why more people dont do that.