

Although I always look forward to decorating for the holidays, I’m pretty particular about what I choose to display. I consider my home to be a canvas of sorts, and seasonal items must meet a few criteria before being added. It’s not that I’m a design expert or anything. I just want my home to feel comfortable and represent my family and me well.
To be considered, festive decorations must…
…be loved. I spent years adding things to my house that I didn’t love because I was trying to meet some outside expectation or simply hurry to fill empty space. I decided to do away with that mentality a couple of years ago. We did a massive purge, and now love is the number one requirement for anything new I bring into my house.
…be meaningful. Uniqueness is always a plus, but I don’t go out of my way to exclude popular items. Whether I bought it in the seasonal section at Target and it seems like everyone and their dog has one or if it’s a one-of-a-kind find or DIY, what matters is that it holds meaning for me and my family.
…be affordable. I won’t clarify this with a dollar amount because affordable means different things to different people. It’s also changed for me over the years as the personal value I place on things has evolved, but I’ll always be a girl who loves a bargain.
…go with my established style. I love texture, simplicity, and organic inspiration. My holiday decorations typically fit this aesthetic and blend in seamlessly with my everyday look.
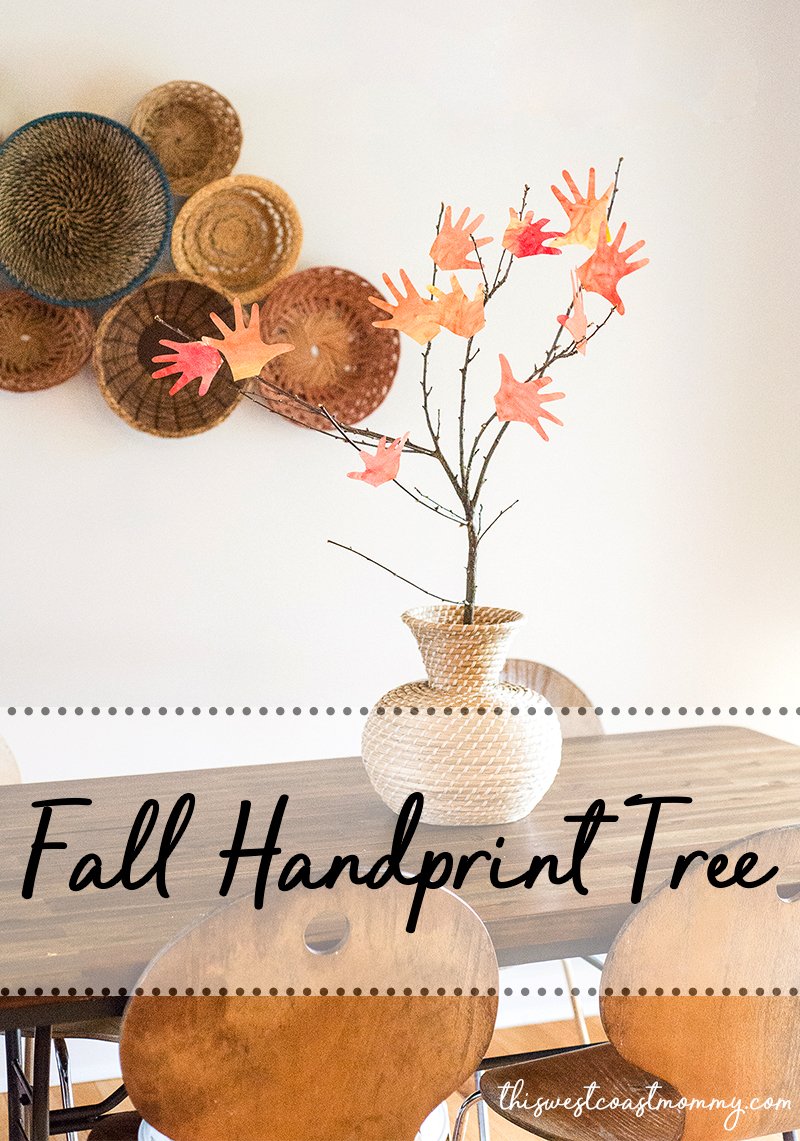
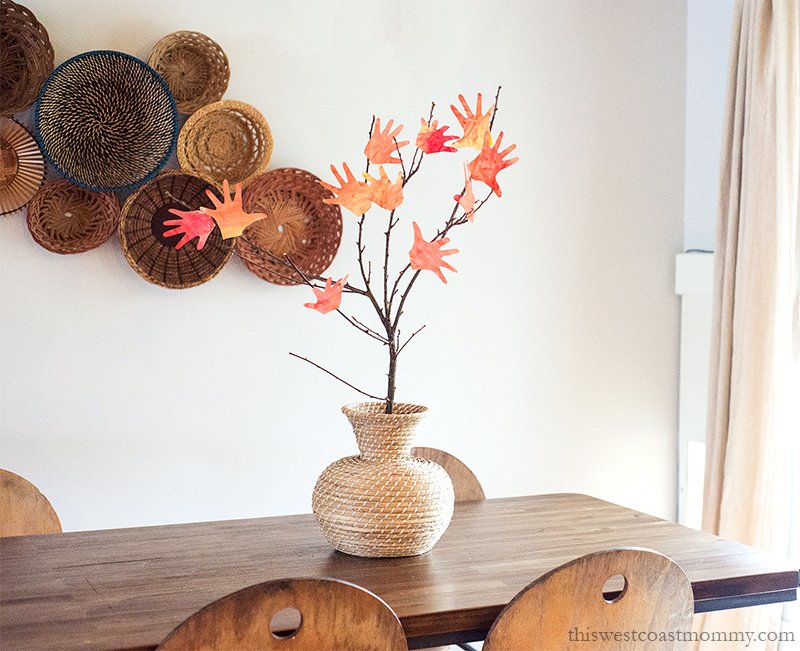
This fall handprint tree meets all my requirements. It’s very personal, almost free, blends in with the look of my home, and I really, really love it!
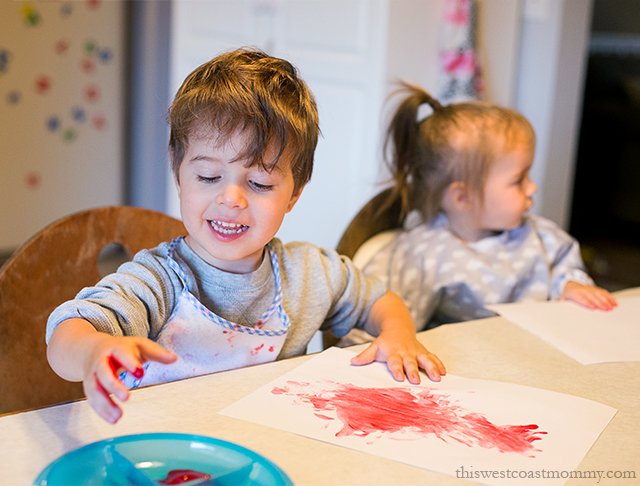
You can do this project with any handprints, but I like the look of smaller leaves, and I’ve got a couple little helpers who were perfect for the job.
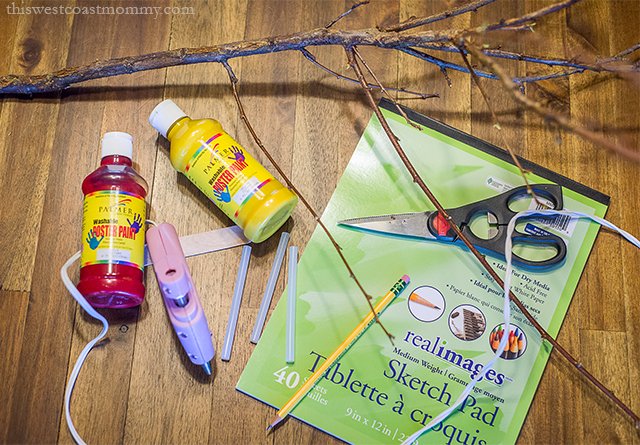
Here’s what you’ll need to get started:
- branch
- white paper (1-2 pieces for painting, plus 1 for hand template)
- red and yellow non-toxic paint
- scissors
- hot glue gun
- pencil
- vase big enough to hold your branch
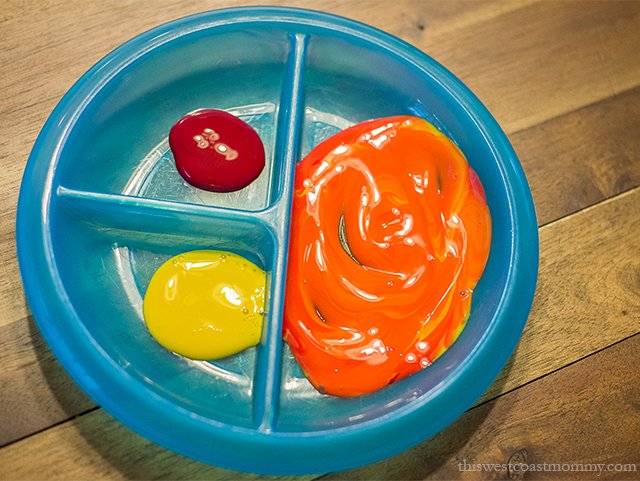
Step 1 – Make a palette of fall colors. This divided tray was perfect for keeping my red, yellow, and orange paint separate, but anything will do.
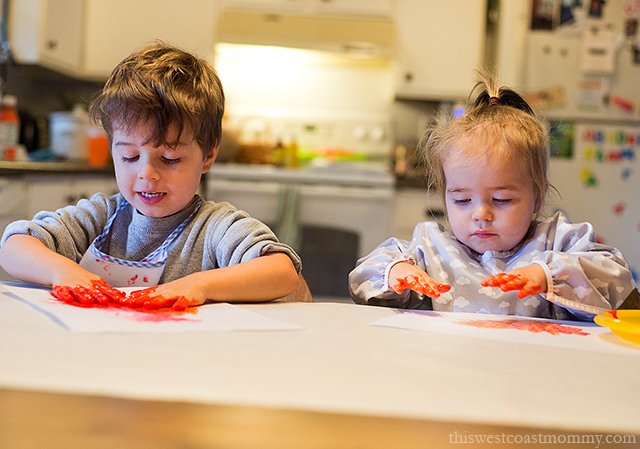
Step 2 – Either paint a couple pieces of paper yourself, leaving no white space, or set your kiddos up for some fall finger painting. There are no rules here. Want to paint a unicorn? Go for it! Just remember to really drown those pages in color…and that you’ll be cutting up your masterpiece later.
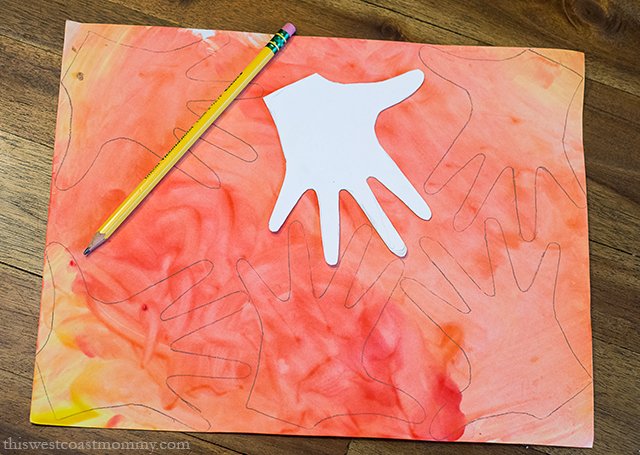
Step 3 – While the paint dries, trace your hands onto the remaining piece of paper. It wasn’t easy to get my one-year-old’s cooperation for this part, so I used my pencil to even her handprint out afterward. Once you have some good lines to follow, cut out your handprints to use as leaf templates.
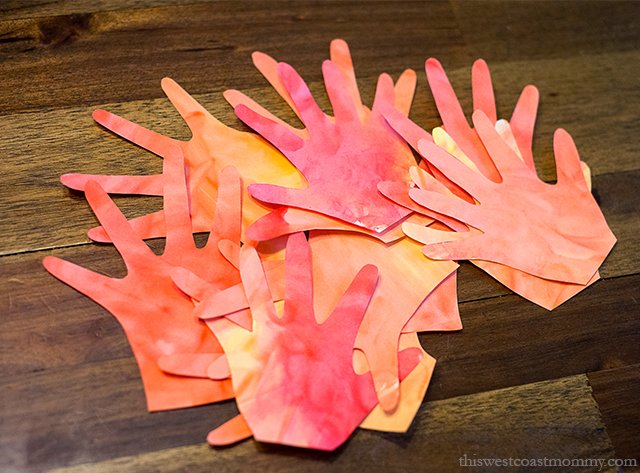
Step 4 – Trace your templates onto your dried paintings, fitting as many handprints on each page as possible. I like to flip the templates over occasionally so the leaves don’t all face the same direction.
Step 5 – Cut out your handprints, and use a glue gun to arrange them on your branch.
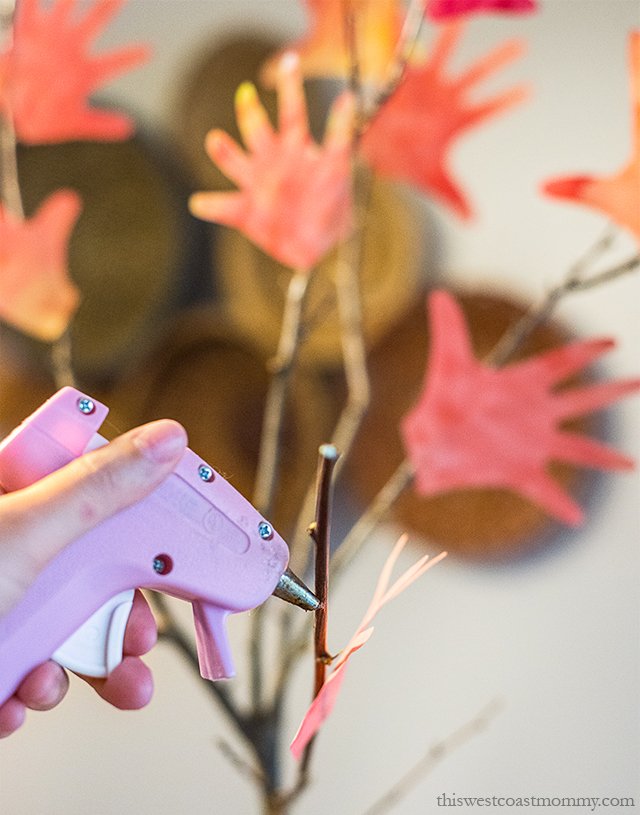
So what’s your style? A nice, sleek branch with handprints placed symmetrically? Or something a little more wild looking? I opted for natural but balanced.
This project was just what I needed to add a little autumn cheer, and whenever I look at it I’m reminded of the fun my kids and I had working together. You may even choose, like me, to save a couple of the handprints as keepsakes.
Happy Fall!

Samantha Levang is a contributor at This West Coast Mommy, specializing in cloth diaper and baby item reviews. She lives in Washington state with her husband, toddler son, Brooks, and new baby girl, Riley. Between diaper changes and loads of laundry, she enjoys landscape photography and the never-ending process of home decorating.


Well done,i like it !
Super cute!!
This is so cute and an easy craft to do with the kids!
oh my gosh this idea is amazing! so easy to do and you dont need much for it. My daughters would have a total blast creating this with mommy 🙂 I have this bookmarked to do over the weekend 🙂
This is a cute craft that kids will thoroughly enjoy making. What’s nicer for kids than getting messy and then having their art on display?
These are so cute! My granddaughters loves craft, will forward this to my daughter. I also love painting. I did a paint night on Monday. It was so much fun!
What a great keepsake craft for fall!
What a great craft to get the kids involved in and it’s so creative.
this is brillilant! I adore handprint crafts and we’ve done quite a few, but this is a new for us to do! Thanks for the inspiration!
Very cute hand print tree and looks fun to make too!
What a cute idea! My mom would love to be gifted by her grandkids with such a fun craft.
What a classy twist on a classic craft! I love the look of this.
Such a cute idea! I think this will be a great thanksgiving hostess gift for the grandmothers in our life.
I love this idea! I’m going to do this with my grandchildren! Thanks for sharing!
I love the natural look of your “hand” tree and the symbolism of your kids’ childhood.
I’m going to have to try this craft with my little godson; he loves to do art and he will really love this. I know his Mom and Nona will love this too.
That’s super cute – I could see trying to save a few leaves each year but making new ones each year too…and see how they grow!
My girl came home from school last week with a hand print turkey! It’s fabulous and made a great centerpiece for dinner with the grandparents yesterday!
Creative fun!!
So cute, affordable and cool and personal – I just love this craft idea!
I absolutely LOVE all of these Thanksgiving ideas! This hand-leaf tree is the first thing I plan to make with my students at school…and my kids at home! Think Thanksgiving table centerpiece!