

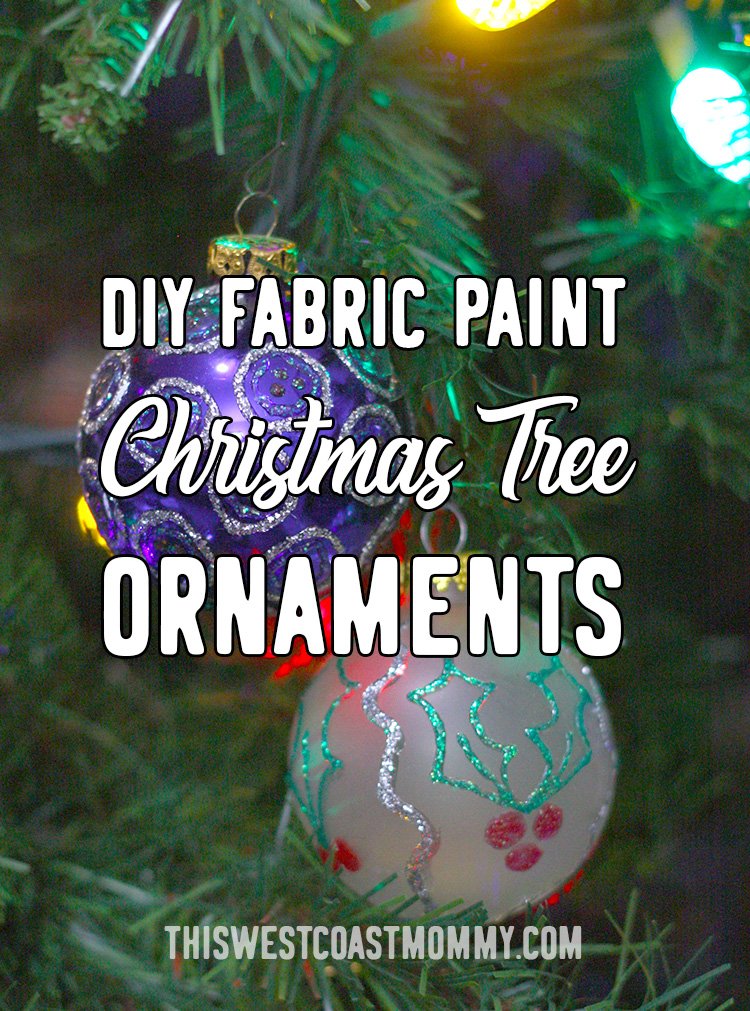
This month feels like a grueling marathon towards Christmas. It seems like there’s always something to do, some special event, shopping, visiting, decorating…the list goes on and on. There are definitely days I’d like to pull a Grinch and skip all our holiday activities. To be honest, crafts aren’t my favourite thing to do, but the kids love making holiday crafts so much that I just can’t bring myself to skip it.
This DIY Christmas tree ornament craft is perfect for a quiet weekend afternoon with minimal prep. Actually, as far as holiday crafts go, this one is more fun than most. The best part for me is that after we’re done, we have one of a kind keepsake ornaments we can put on the tree year after year instead of just adding more clutter around the house.
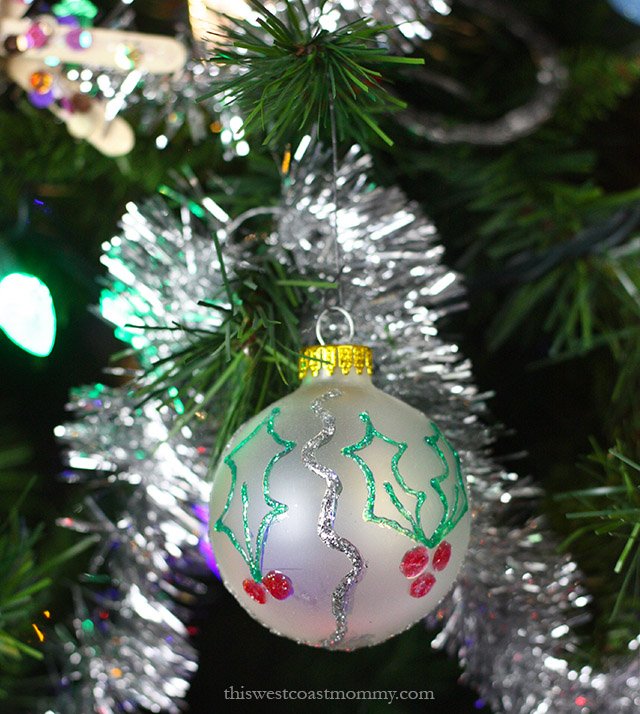
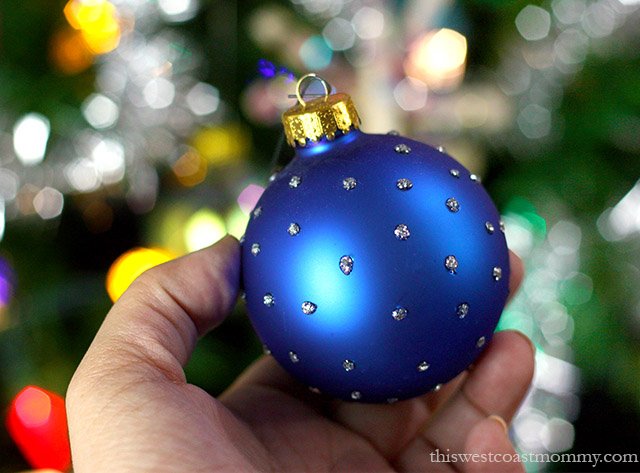
All you need is some plain glass ornaments and fabric paint. Coloured or clear balls both work well, so long as they’re plain.
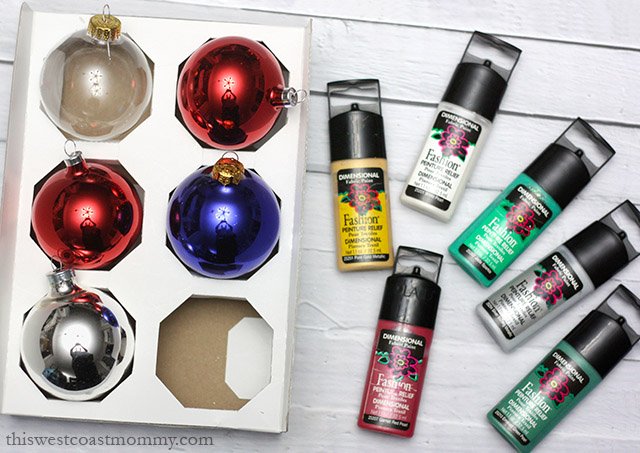
Fabric paint sticks well to the smooth glass finish and comes in regular, pearl, and glitter finishes, whichever your imagination desires. Can you ever have too much sparkle on your tree though?! Fabric paint’s viscosity gives it a 3D dimensional effect. Once it dries, you can easily build up coats of paint in certain spots for even more dimension.
You can paint your design freehand, but if you feel like you need a little help, you can always draw your design on first with a marker and then trace over the lines with your fabric paint. This is especially helpful for kids who might get frustrated when their vision doesn’t match their execution.
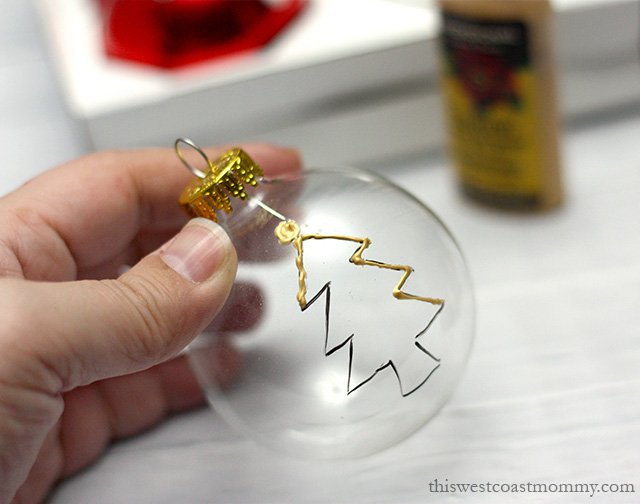
The thin tips on the bottles are designed to control the flow which makes it easier to draw in details and even write on your ornaments. If you make a mistake, it’s easy to wipe the paint off and try again. Throw down some newspaper in your working area and keep a supply of Q-tips and tissues nearby for fixing those inevitable smears and slip ups.
Be sure to include the year somewhere on the ornament so you’ll always remember when you made these together.

Paint one side and let it dry before doing the other side. I rested the ornaments in the boxes they came in while they dried.
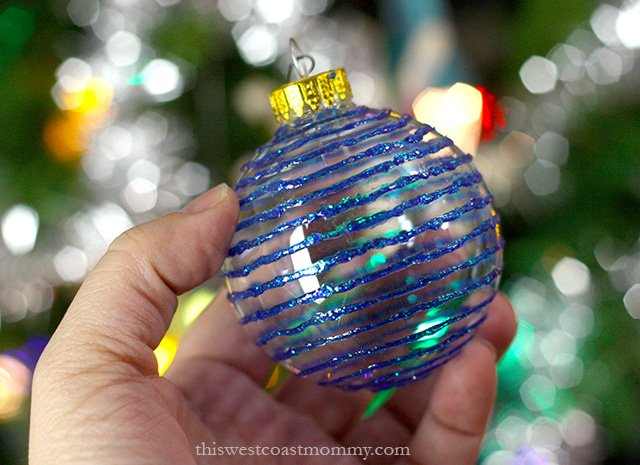
Here are some of the ornaments we made, but you’re limited only by your imagination. Write a meaningful quote, mark a significant occasion (Baby’s 1st Christmas!), draw an emoji, create an abstract design, or mix paints for a marbled effect. Add a handful of sequins inside a clear ball or glue on ribbons, googly eyes, or other embellishments. The sky’s the limit!
Disclosure: This post contains affiliate links. This West Coast Mommy is a participant in the Amazon Services LLC Associates Program, an affiliate advertising program designed to provide a means for sites to earn advertising fees by advertising and linking to Amazon.com.


These orniments are wonderful and would be great to make with kids.
What a sweet idea! Very doable craft for the kids – and memorable too!
This is an awesome idea, I have fabric paint laying around and never thought of doing this, this would make a great personal gift for the grandparents and or teachers as well!!
Great job those are so pretty,this will make a fun project to do with the grandkids !
Love this DIY craft, they look great, thx!