

As the seasons change I get the urge to change up my decor along with it as well as give myself something fun to do when the weather turns cold and soggy in the Northwest. Now that I’m a mom with a toddler on the loose and another little one on the way, I have to be pretty selective about the projects I choose to start.
I’ve learned from past experience that taking on too much usually results in WAY too many trips to the craft store and feeling resentful about my dining room table being taken over by the mess for weeks. What I love about this easy pinecone mum arrangement is that it gives my home a warm, fuzzy, fall feeling all season long and it fits my criteria for the perfect busy mom craft:
- Inexpensive
- Can be done in 1 or 2 nap times
- Looks more complicated than it actually is
This arrangement can be done for less than $15, but I happened to have a lot of the supplies on hand already, so it only cost me $6. Score!
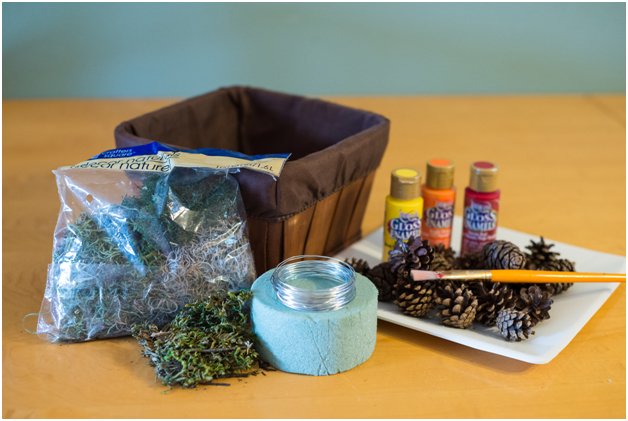
Here’s what you’ll need:
- Sturdy pinecones (I picked mine up for free on a walk through the neighborhood)
- Small basket
- Fall colored paints
- Paintbrush
- Floral foam
- Floral wire
- Fake greenery
- Cotton swab
- Wire cutters
- Paper plates for each color to dry on (the wet pinecones can be a bit roly-poly, so keep the different colors separate)
Most of these items can be found at the dollar store, and, although I used silk greenery in the above arrangement, you can save even more by filling in the bare spots with a bag or two of fake moss instead.
Ready? Go!
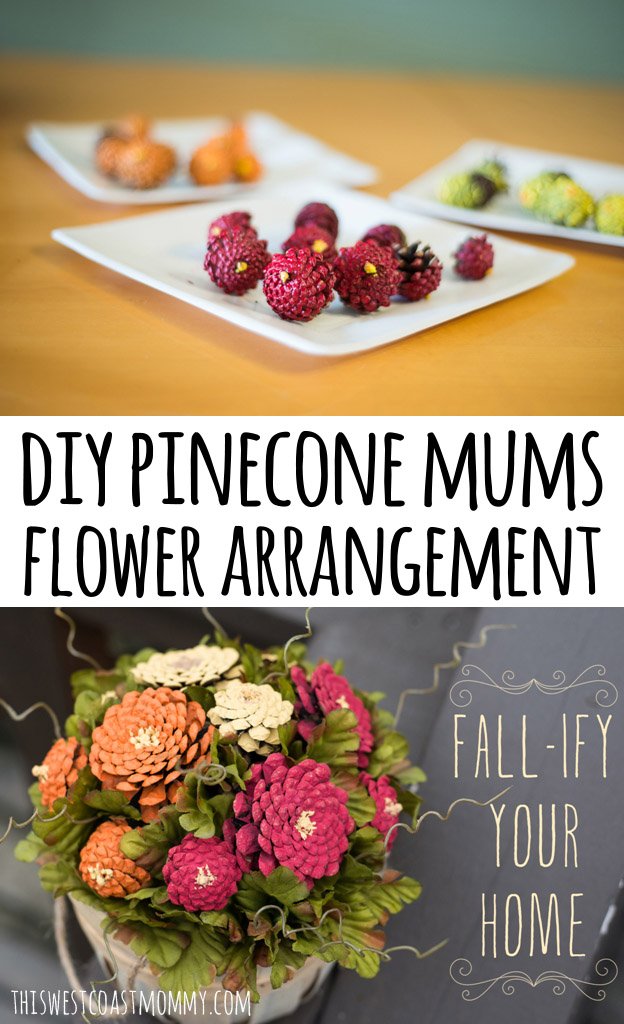
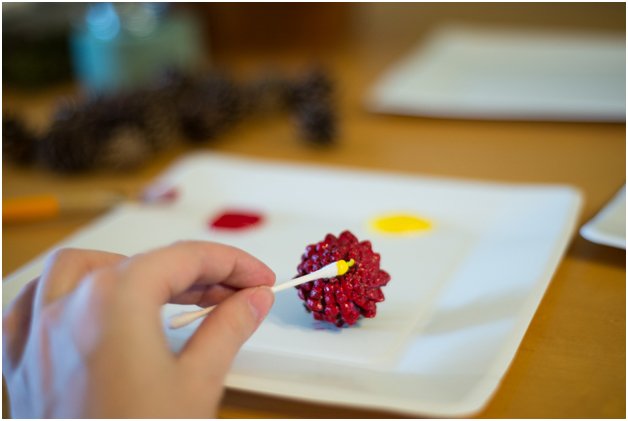
1. Start by painting the pinecones in your desired colors. Depending on the variety you found, you may choose to paint from the top down or the bottom up—whichever side looks more like a cluster of petals. Paint down to the widest part of the pinecone so no brown will show through once they’re arranged.
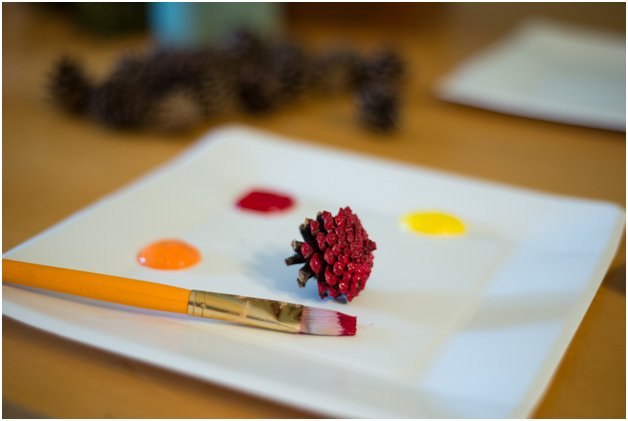
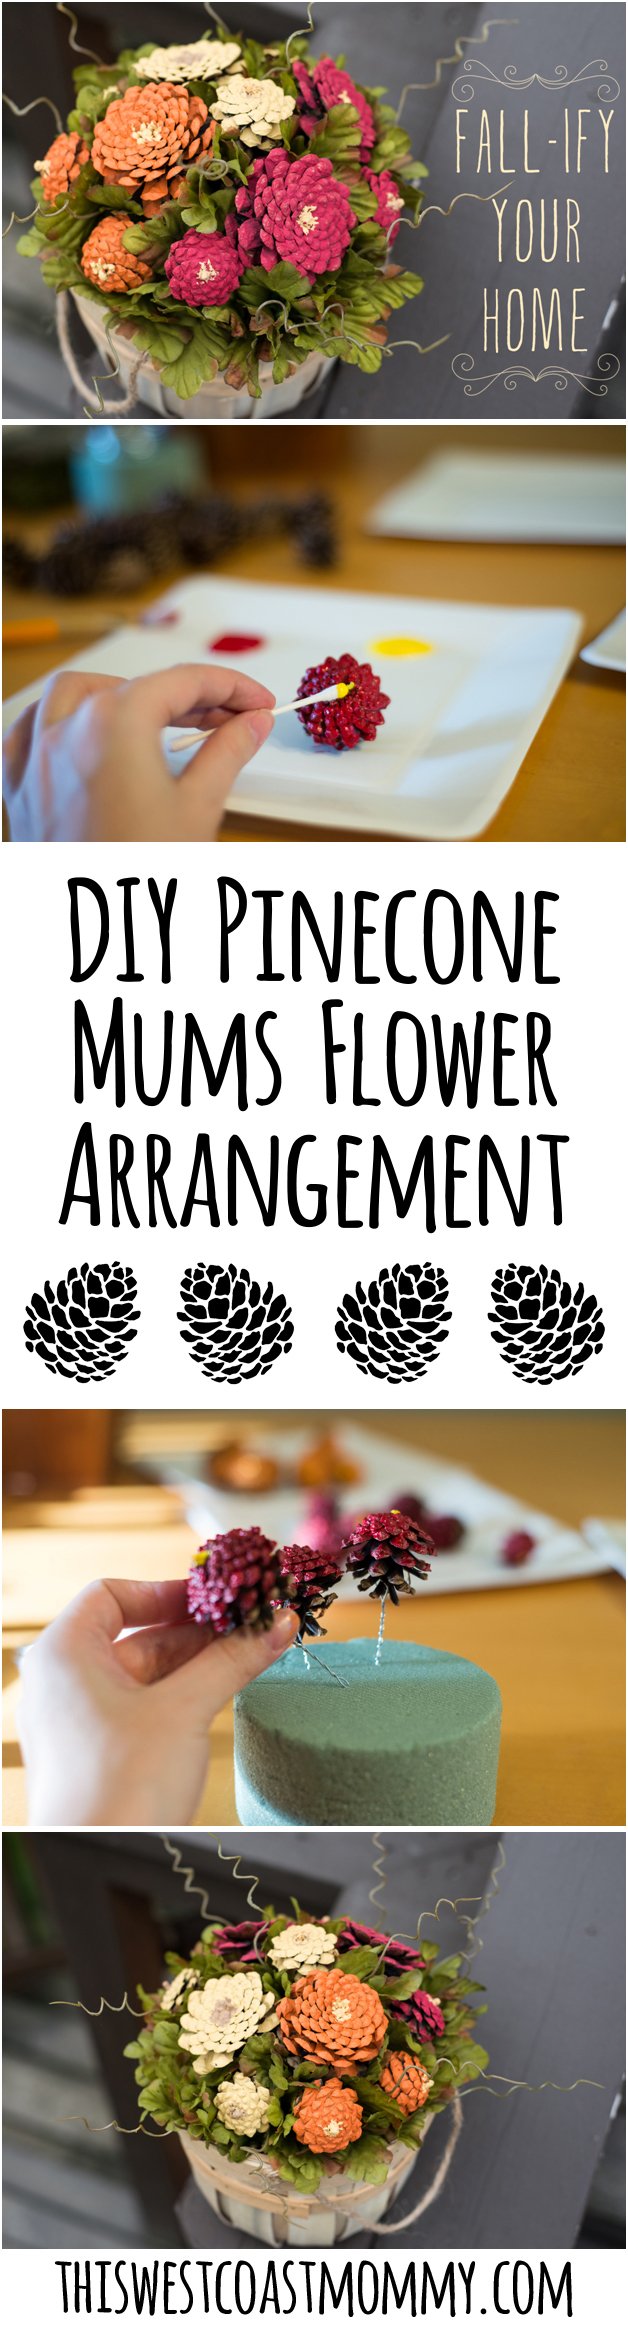
2. To give your mums more dimension and make them instantly recognizable as flowers, use your cotton swab to put a small dab of contrasting color right in the middle.

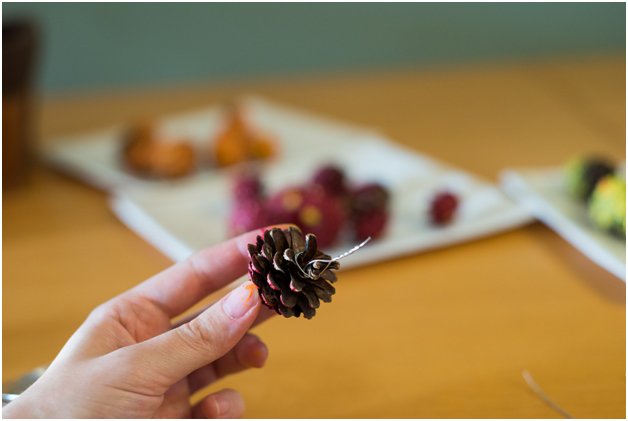
3. Once your cones have dried to the touch, carefully secure a piece of floral wire to the base leaving long enough ends to twist together into a stem. The one pictured below actually should have been a little longer. I found that 2 to 3 inches is ideal to work with.
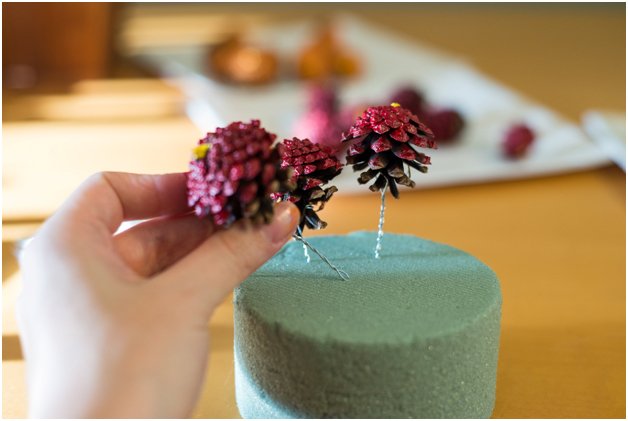
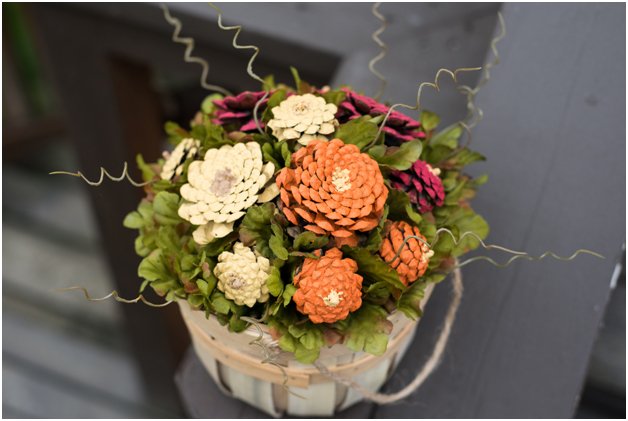
4. Now arrange your mums by poking the wire stems into the floral foam. This can be done in or outside the basket, but the key is simply to keep adjusting your flowers and greenery until it looks right. A couple of things I’ve noticed from examining real mums is that the flowers are really tightly packed, and most of the greenery is fringed around the base.
5. Step back and admire your handy work, you crafty thing, you!
 Samantha Levang is a contributor at This West Coast Mommy, specializing in cloth diaper and baby item reviews. She lives with her husband and one-year-old son in Washington state, and they look forward to welcoming a baby girl into the family this January. Between changing diapers and Braxton Hicks contractions, she enjoys landscape photography and the never-ending process of home decorating.


What a great idea! Must try to make an arrangement with my kiddos. 🙂
This is just so cute! I love how easy it is…and cheap. Using pine cones in decorating is something I love to do. Even my hubby will pick up a pretty one for me.
This looks great. I really want to give this a try. It would look great on the hearth this Fall.
This is an amazing DIY project!! I used to do fake flower arrangements when I was around 14-16 and for some reason got out of it, it’s great to do and it’s also relaxing!
This looks like so much fun !! Great fall craft !
These are really cute!! I will have to make some 🙂
This looks just beautiful and what a fun project. I love doing things like this it is so relaxing.
I love this! So nice, and not too hard either.
I cant wait to get hubby out picking up those Pine cones in the backyard,i am going to do this project with my grandkids im sure they would also love to make one for their Mom.
I have so many pine trees and this is one crafting option that never occurred to me. Thanks for sharing, these mums are adorable!
thank you for posting this. i am so not creative but your post made this look easy and i might try this out! thank you!!
This is a cute and do-able project. I have a big bag of pinecones that I’ve been intending to make into a wreath, but this is a good idea too.
Hiw beautiful. My in laws have this stuff on hand too. We have a lot of pine cones around here. I would live to make this. Never thought about this craft before. Thank you.
Glad i came across this again must make a note to collect those pine cones again.
I love how the fake greens have the brown edges… I thought they were real! I would have gone to the store and chosen perfect ones which would NOT have worked. Love this!
I love this fall pinecone mums flower arrangement. I have pinecones, Picked for free as well. I have some other accessories as well. I think it will make a wonderful fall centerpiece as does yours. Thank you, Samantha, for this delightful crafty idea.
I’ve pinned this as I think it’s adorable. 🙂
I am not normally one for dried flower arrangements but this sure is a cute one and a fun craft to boot.
Oi adorei muito seu trabalho, sou artesã e professora, o arranjo de pinhas é lindo mando um grande abraço para você.
Ana Sofia
I love this idea